
Figuring out how to organize pots and pans in the kitchen is often not as simple as it sounds! In fact, finding a space-saving and efficient way to store them (and their lids) is a huge source of frustration for many, including myself.
I’ve done my research and discovered several ingenious ways to handle this dilemma. I’ll share my favorites below, plus some interesting information on caring for your cookware and how long (on average) you should keep it. You may be surprised! Let’s dig in.
And, if you’d like to save these ideas for later, just enter your info below and I’ll send them straight to your inbox!
Have pots & pan tips sent to email to save for later:
This post contains affiliate links. I earn a commission from qualified purchases at no cost to you. See my Disclaimer for more information.
1. Hang Pots and Pans from a Ceiling Rack
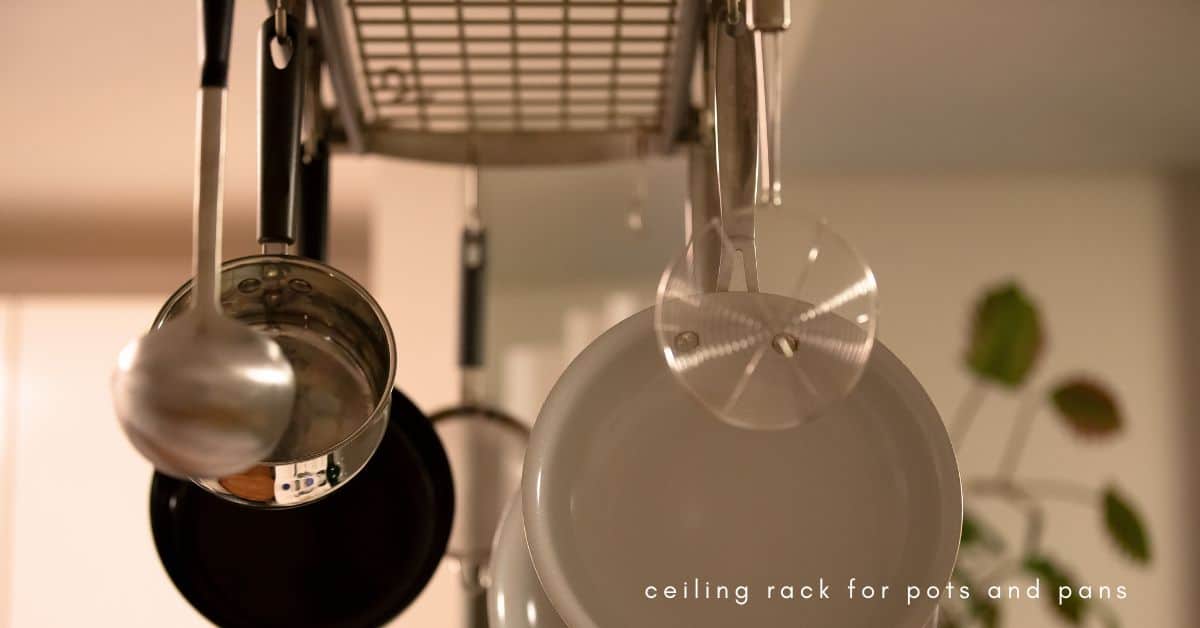
Starting from the top (literally) and working our way down: hanging pots and pans from the ceiling is a brilliant way to use empty space, free up cabinets and drawers, and gain easy and instant access to your cookware when it’s time to get cookin’.
And it adds a little “professional chef lives here” feeling to the kitchen!
There are a few ways to tackle this solution. If you’re a DIY type, you can create a pretty, rustic ceiling pot rack by following this project guide from Home Depot.
If you’d rather purchase a ready-made rack, Amazon offers this really nice option below:

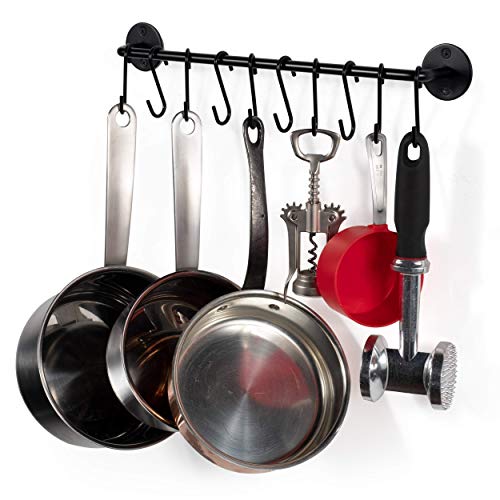
2. Hang Pans From A Wall Rack
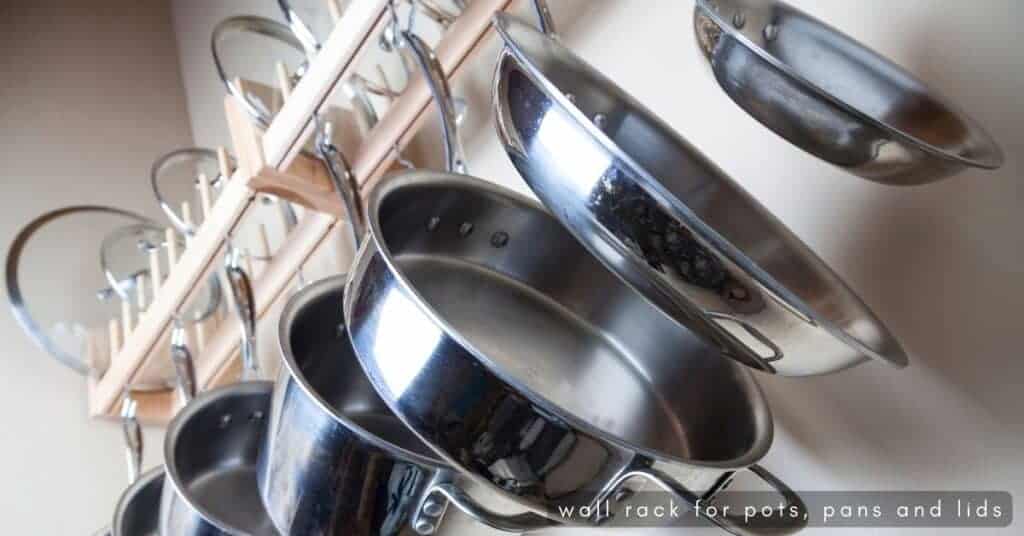
Empty wall space is like a goldmine when it comes to kitchen organization! I always say when storage space is hard to find, look up (the wall).
If you’ve got some blank space just begging for pretty (and functional) shelving, you’ve got a place to organize pots and pans!
Mounted Hanging Rack for Kitchen Storage
Here’s a solution that measures just 30 inches wide with shelves for big pots and hooks for 12 pans and utensils:

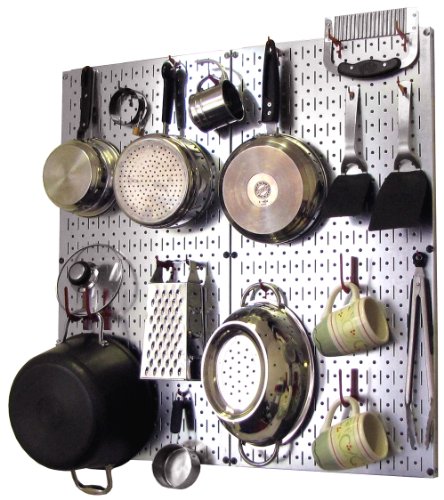
3. Hang Pots and Pans From A Pegboard
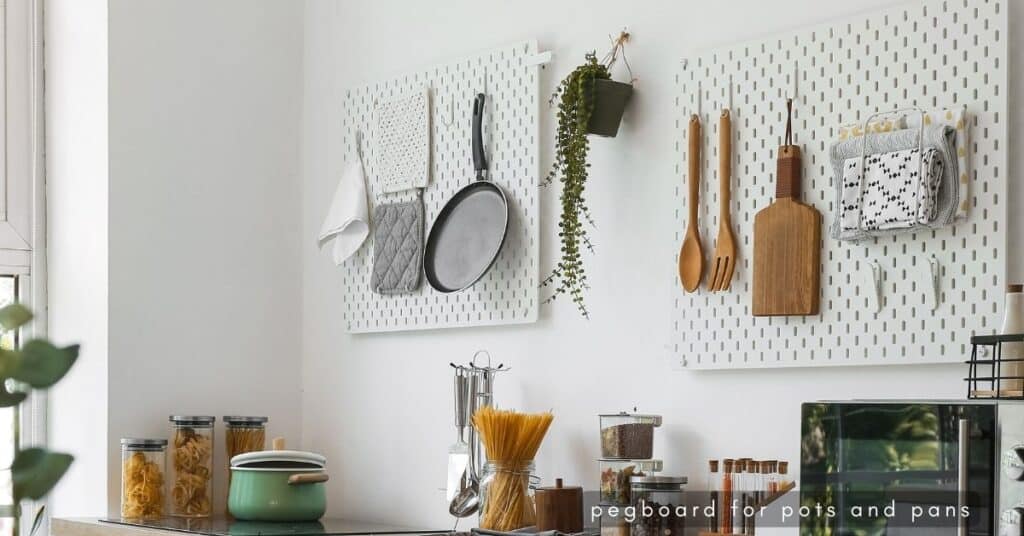
If you don’t need (or don’t have the space for) wall shelving, you can mount a flat pegboard on the wall to hang pots, pans, cooking utensils…you name it!
What I love about the pegboard solution is that it offers endless options for arranging and organizing kitchen items.
And you can really think outside the box…beyond pots and pans, you might hang a spice rack for jarred herbs, or even hang cuttings from your garden to dry!
Kitchen Pegboard Organizer
This option from Amazon comes in a TON of colors to fit any kitchen decor. It would also work nicely in a laundry room, utility closet, craft room or garage/workshop area. Pretty darn versatile!
4. Hang From A Wire Pantry Shelf With S Hooks
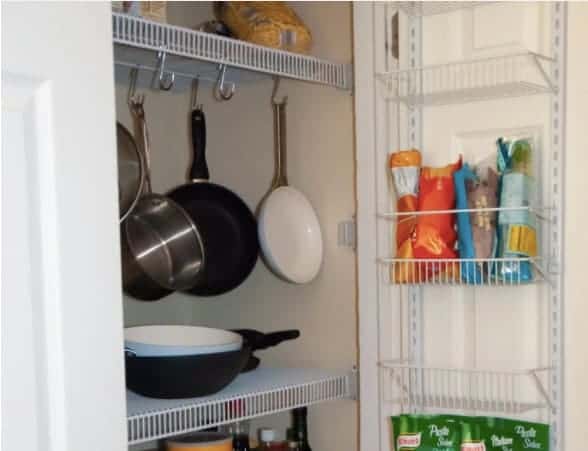
Kait from Slumber & Scones got creative in her kitchen pantry and used S hooks on her wire shelves to secure her pots and pans.
I love the simplicity and resourcefulness of this solution! No drills or anchors needed, and everything fits neatly into one space.
S hooks are easy to find and can be ordered from Amazon in a range of colors and sizes.
For more ideas on pantry organization and storage, see:
DIY Weekend Pantry Makeover
5. Hang Pots and Pans Beneath A Cabinet

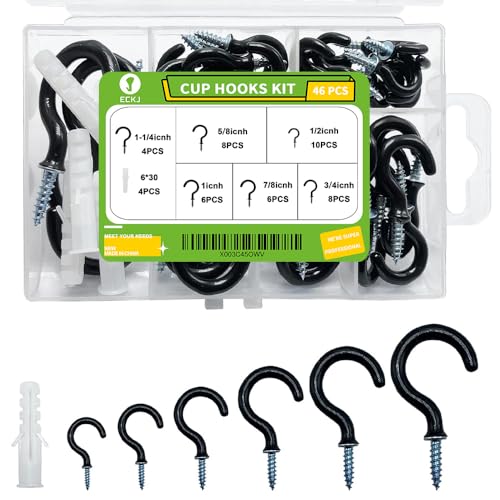
Short on wall space? Look beneath the kitchen cabinets! You can install cup hooks or a kitchen rail to the bottom of a cabinet and hang pots and pans from there.
NOTE: If you try this solution, be sure to measure both the space and the length of your pots and pans to ensure they’ll hang properly. Also, use screws that are shorter than the thickness of the cabinet bottom so they don’t protrude into the cabinet itself!
Some options that work well beneath a cabinet:
Cup Hooks Kit
I like this option because it features 70 hooks in varying sizes. This will help ensure you have the right size for your particular pots and pans, plus plenty left over for other uses like hanging planters, purses and bags, belts, scarves, bathrobes, etc.
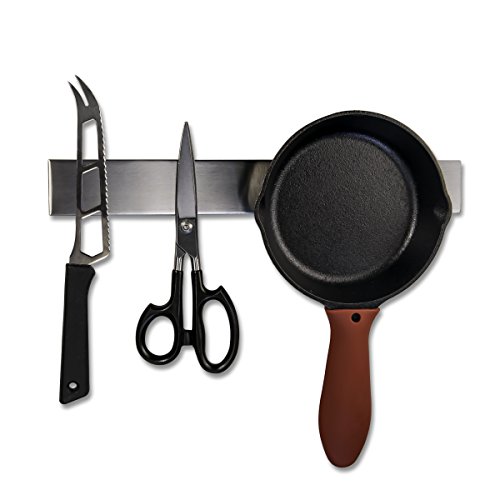
6. Hang Pans On A Magnetic Knife Strip
To me, magnetic knife holders always look very sleek, modern and streamlined in the kitchen. And guess what? They can be used for far more than knives!
Think: kitchen tools and utensils, pots, pans, lids…anything with metal will work. Here’s an example:
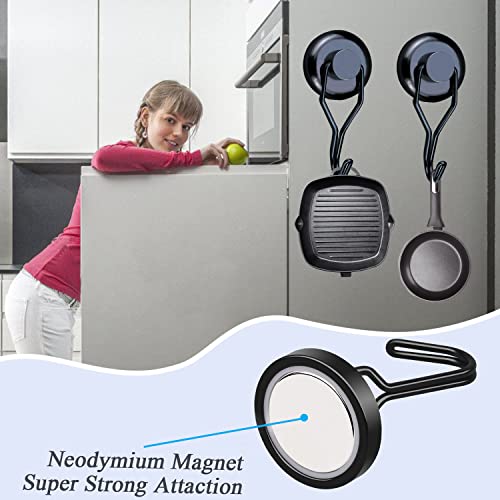
7. Hang Pans On The Refrigerator
You know that side of the refrigerator that typically holds random business cards and artwork from the kids? What if you used it for something a little more practical…like pans?
I know. MIND. BLOWN. Right? But it can totally be done, and it will help you save space in your cabinets while retaining instant access to your cookware.
All you need are some heavy duty refrigerator magnets, like these puppies that can hold up to 80 lbs and come with a scratch-resistant rubber base:
Heavy Duty Hook Magnets
8. Hang Pots and Pans Inside A Cabinet
Ok, I personally love this sliding rack that attaches to the back of your cabinet, allowing you to hang your pans and lids neatly in a row! When it’s time to get cookin’, just slide the rack out and choose your pan.
What a fabulous concept, and a great way to avoid bending down and rummaging through heavy cookware every time you want to get dinner started.

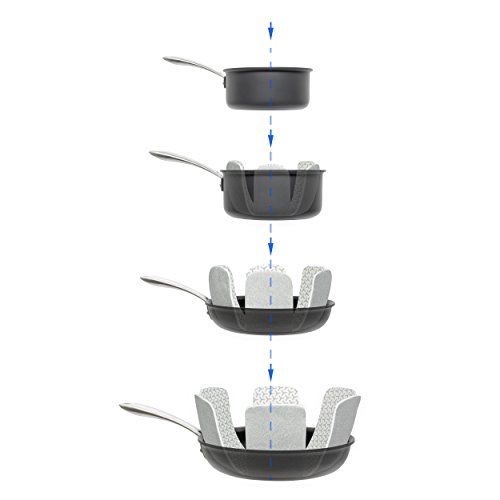
9. Stack Pots and Pans Inside A Cabinet With Protective Dividers
It IS possible to simply stack or nestle pots and pans together in a cabinet, though there are a few downsides.
First, it can be a hassle (and hard on the knees and back) to bend down and wrestle heavy cookware that’s been stacked.
Second, it’s easy to scratch or damage your pans in the process of stacking and un-stacking them, particularly if they have nonstick coatings.
A solution to problem #2: these handy protective dividers! Made from premium polyester felt with non-slip texture, they come in sets of six and measure 16 inches in diameter. (They can easily be trimmed down to fit smaller cookware.)
Pan and Pot Protectors
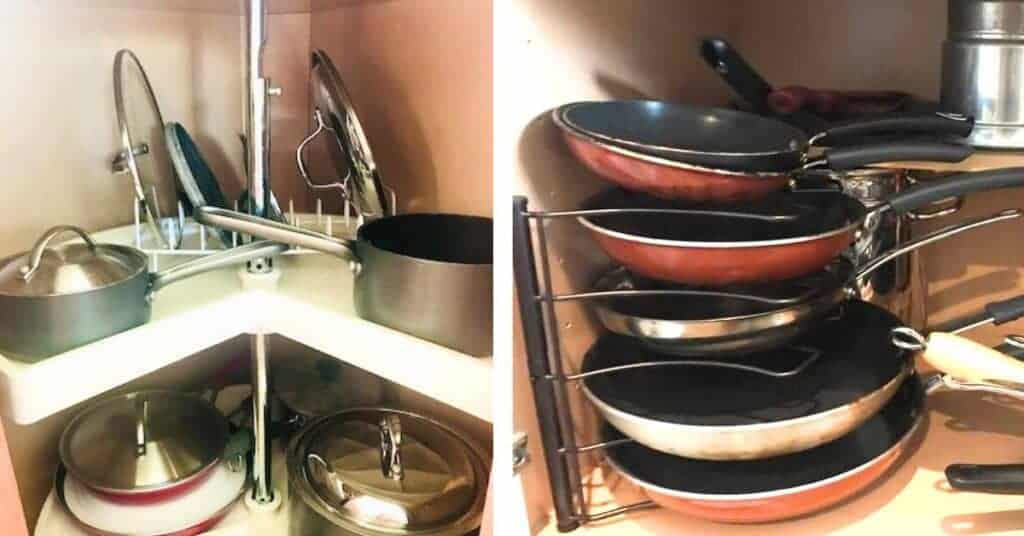
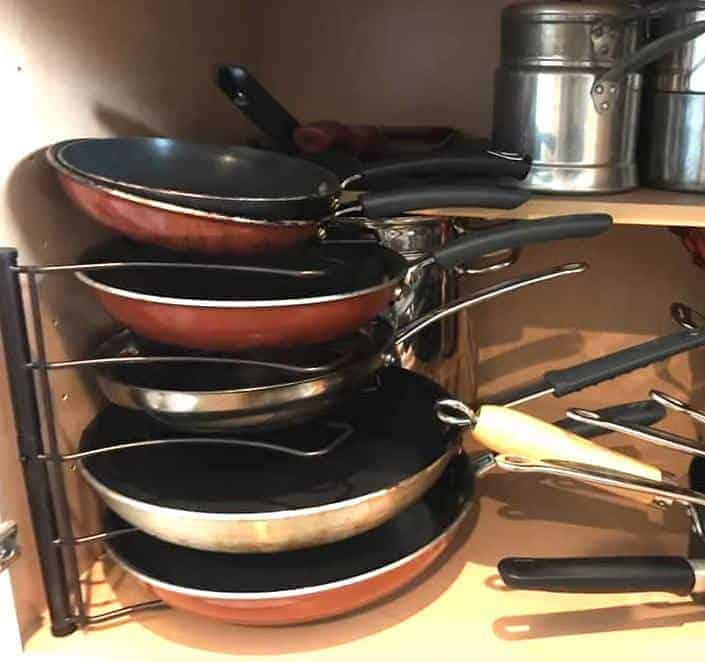
10. Stack Pots and Pans Vertically With A Pan Rack
If you know me, you know I’m all about maximizing vertical space. So, I got pretty excited when I found an organizing solution that allows for vertical stacking of pots and pans — with no scratching or wrestling required!
Cabinet Pan Organizer Shelf Rack
11. Store Pots and Pans On A Cabinet Slide-Out Shelf
Save your back some serious strain by installing a cabinet slide-out shelf for your pots and pans!
These babies work for any cabinet with a 12″ opening (or wider) and are also great for bakeware, dishes, serving platters…you get the picture.
Slide Out Cabinet Organizer

12. Store Pots, Pans and Lids Horizontally With A Rack Organizer
When you’re looking for a simple-yet-effective solution for storing your cookware, a no-hardware-needed rack does just the trick.
This option accommodates pots, pans, lids and bakeware like muffin tins and stores everything upright for easy access and maximum use of space:
Pan and Pot Lid Organizer Rack

13. Use Your Corner Lazy Susan Cabinet to Store Pots, Pans and Lids

If you’re fortunate enough to have a Lazy Susan corner cabinet like I am, consider using it for your pots and pans!
Until recently, I was storing kitchen items like strainers and mixing bowls in this space. Then I had the idea of moving in my pots and pans, and it was like the sun peeking out from behind the clouds.
As you can see, there’s plenty of space for several large pots and I’ve nestled my pans with a protective paper plate between them. I was able to fit my lid organizer in the back, too! It’s a super convenient solution for me.
(See more options for lid organizing below!)
14. Store Pans In A Toe Kick Drawer
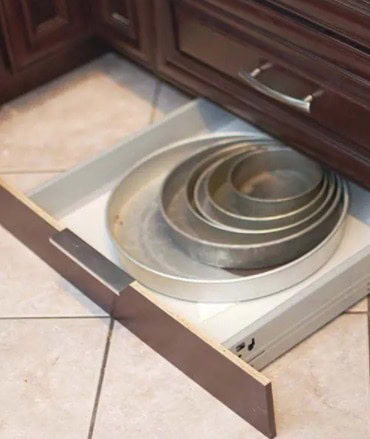
You know those boards that run between the bottom of your cabinets and the kitchen floor? They’re called toe kick boards, and behind them is very useful, empty space — a kitchen organizer’s dream!
Nicole from tikkido.com has a fabulous DIY project for installing hidden drawers behind those boards using inexpensive IKEA drawer kits. She stores cake pans in hers, but they could also be used to store shallow frying pans or lids!
15. Hang or Stack Your Pot Lids
While several of the tips above can apply to pot lids, I feel these troublesome-but-necessary items need their own section.
Depending on the space you have available, you may be able to either stack or hang your pot lids using a variety of organizing solutions. Here are some helpful ideas:
Use A Standing Lid Rack In The Cabinet
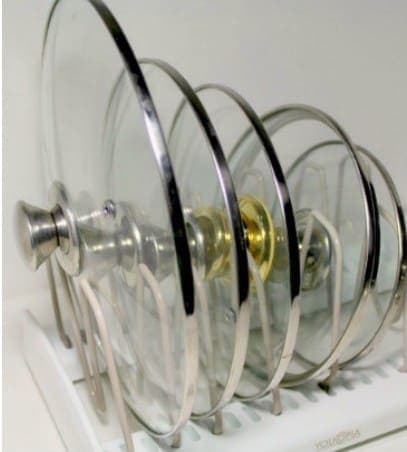
A solution that works in my kitchen is a handy lid rack. I store my lids upright in the slots, right next to the pots and pans. My fellow blogger Melissa from Thirty Something Super Mom does the same.
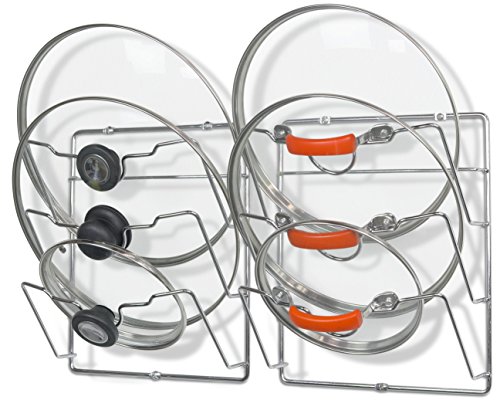
Try A Wall-Mounted Lid Rack
When there just isn’t cabinet space for a flat lid rack, a wall-mounted rack might do! This option can be attached to empty wall space, the inside of a cabinet door, or even the back of a pantry door.
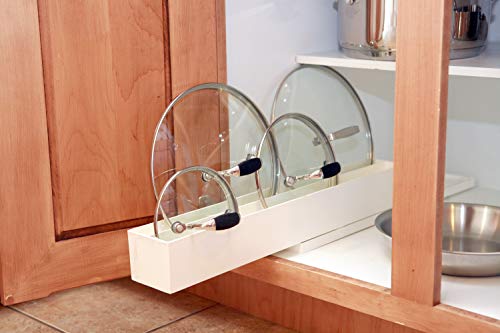
Store Lids On A Slide-Out Rack
Just like with pots and pans, it can be a real pain in the knee/back to try to wrestle lids from the back of a bottom cabinet. Save yourself the hassle with a slide-out rack that maximizes cabinet space with a long, sleek design:
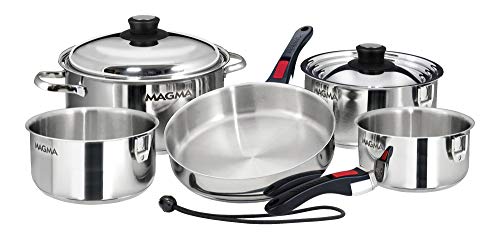
16. Invest in a Set of Nested Cookware
One more way to organize pots and pans is with a set of nested cookware. This 10-piece stainless steel set takes up the space of one pot and currently has a 5-star rating on Amazon with over 500 reviews:
More information on how to organize any space in your home:
Organizing Your Home: A Beginner’s Guide
17. Use Under Shelf Baskets to Organize Baking Pans
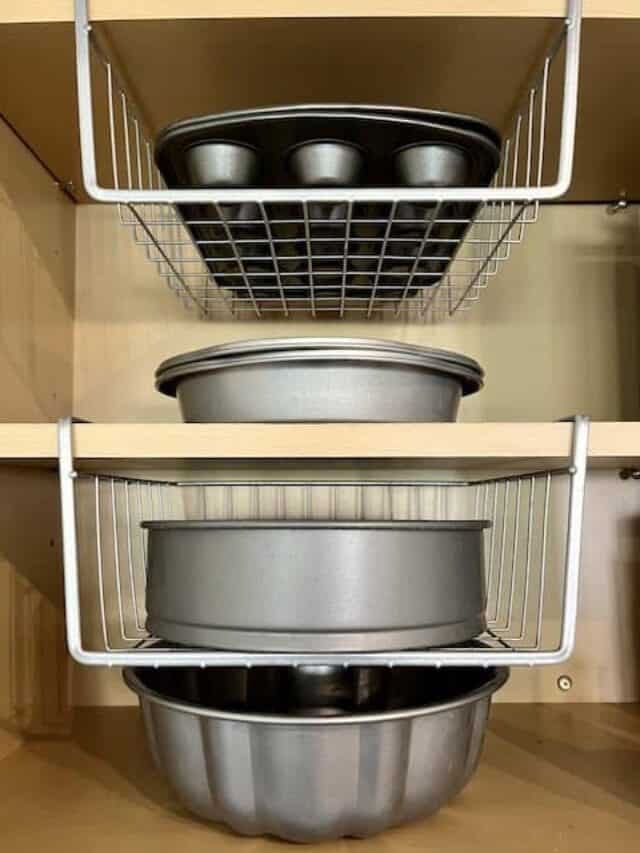
Don’t forget those baking pans! I use under-shelf baskets to maximize vertical space in my kitchen cabinet. This offers me easy access to my pans.
See more tips on how to organize baking pans and supplies.
FAQs: Storing Pots and Pans
This is a great question, and one you should ask yourself before you go through the process of trying to organize pots and pans (especially if you have a lot).
The first step in organizing any space is purging unnecessary items! It’s impossible to be truly organized when you have more “stuff” than will reasonably fit.
So, how many pots and pans does a household need? According to Real Simple, the average household only needs three: a 2-quart saucepan, an 8-inch saute pan, and an 8-quart stock pot.
Raise your hand if you have more than three! (Mine is up…) So, if that number seems a little light to you, perhaps consider how many different dishes you need to cook on an average night…and how many burners you have on your stove.
The odds are, unless you’re cooking for a VERY large family, you probably aren’t using more than two saute pans and saucepans at a time, right? So let’s bump our number to five necessary pots and pans, including the stock pot. I can live with that, can you?
(And even more importantly: I can organize five pots and pans pretty easily. I’ll bet you can, too.)
Small apartments and homes with small kitchens require some creativity when it comes to organizing pots and pans. Find ways to maximize vertical space wherever you can.
Look for empty wall space to hang a pegboard or pot rack, consider hanging them from the ceiling, or try a baker’s rack.
If you’ve invested in decent-quality cookware, you’ll want to care for it properly so that it lasts a long time.
How to care for pots and pans depends on their coating:
Stainless Steel
Stainless steel is probably the easiest to care for. It can be stacked without fear of scratching. It can be scrubbed clean with a pad and soap and water, and if it develops marks or rust it can be scoured with a cleaner like Bar Keeper’s Friend. (This is my favorite stainless steel cleaner…I use it on my sink, too.)
Nonstick
A nonstick surface may be more convenient to cook with, but it’s rather fragile. These pans should not be stacked together without protective dividers to protect them from scratches. Use only plastic or wooden cooking utensils with them. Metal will scratch the surface.
According to All-Clad, baking soda and a non-metallic sponge or brush are best for cleaning nonstick pans.
Cast Iron
I love, love, love my cast iron skillet! I use it all the time for all kids of dishes. When I first got it, I was a little overwhelmed by the unique way it needed to be cared for, but after a while I got used to it.
The best way to clean cast iron is to clean it right away after using it. Do NOT soak it overnight, as it will develop rust. (It’s iron, after all.) Just scrub it clean without soap (you’ll taste soap the next time you cook), rinse with water and dry. Then “season” the pan with a light coating of oil before you store it.
I would use protective dividers when stacking cast iron pans, to keep the oiled surface intact.
4. Is It OK to Stack Pots and Pans?
You can stack pots and pans without damaging them if you use a protective divider to prevent them from scratching each other.
The divider can be a paper plate, a kitchen towel, a placemat cut to size, or you can purchase pot and pan protectors. In the photo below, I used paper plates to protect my pans.
5. How Long Should You Keep Pots And Pans?
Like their care, the lifetime of pots and pans depends on their coating and how well they’ve been maintained.
According to TheKitchn, nonstick pans last about five years before they need to be tossed. The reason? The nonstick coating tends to become scratched and start peeling. This is no bueno if it reacts with your food and/or gets ingested, as it can be a health hazard.
Stainless steel and cast iron pots and pans can last many years, as long as they are in good condition. Examine them to make sure they aren’t warped or chipped or losing their ability to cook foods evenly across the bottom.
When it’s time to dispose of pots and pans, Earth911 recommends finding a way to recycle them (vs. adding them to a landfill – especially the nonstick coated pans). There are a couple of ways to do this:
Check your local curbside recycling program – do they accept nonstick cookware? Some do, some don’t.
Contact a scrap yard near you. They’ll often take nonstick metals along with other metals.
Contact your cookware manufacturer to see if they offer a recycling program or an exchange if you buy new replacement pans from them.
More Kitchen Organization Articles
Fantastic Fridges! 5 Steps to Organize Your Side-by-Side Refrigerator
How to Organize Your Stand-Up Freezer Like a Boss
The EASIEST Way to Organize Under the Kitchen Sink
Simple Ways to Organize Kitchen Drawers
9 Smart Spice Storage Ideas for a Small Kitchen
12 Cozy Ways to Organize Your Kitchen Coffee Station
12 Life-Changing Ways to Organize With a Lazy Susan
Easy Deep Cabinet Storage Ideas
Last update on 2024-04-18 / Affiliate links / Images from Amazon Product Advertising API
Gοod article! We will be linking to this great post on our sitе.
Keeρ up the gօоd wгiting.