The refrigerator is the most-used appliance in the house, and often one of the most cluttered. And sticky. And, well, just plain…yuck.
I recently decided it was time to put an end to misplaced and forgotten food and drippy shelves once and for all! I discovered it takes just five steps to organize a side-by-side refrigerator:
1) Declutter
2) Clean
3) Sort Food by Type
4) Create Zones
5) Arrange for Efficiency
Not too bad! Are you fed up too? Ready to finally overcome your fridge frustration? Let’s get it done!
If you’d like to save these tips for later, just enter your info below. I’ll send them straight to your inbox.
Have tips sent to email to save for later:
This post contains affiliate links. As an Amazon affiliate, I earn a commission from qualified purchases, at absolutely no cost to you. Please read the Disclaimer for more information.
Read on for my favorite tips to avoid drips and spills in the fridge and the BEST refrigerator organizers. (PLUS…some FAQs on storing foods properly and refrigerator cleaning/maintenance.)
Step 1: Declutter the Fridge
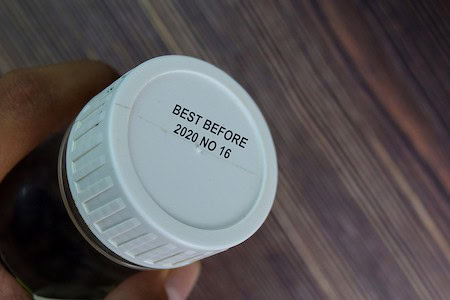
Decluttering is always the first step in any organizing project. Go through every shelf and drawer in your refrigerator remove and toss any old or expired food. I’ll bet you have more in there than you realize!
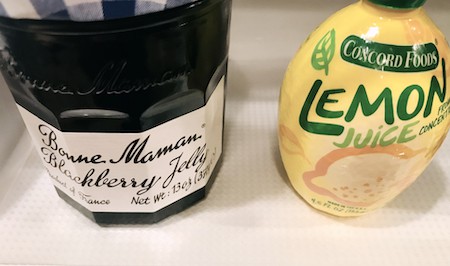
Check the expiration dates on all of your condiments, salad dressings, marinades and sauces.
Leftovers only have a shelf life of around three days in the refrigerator; after that, your risk of food poisoning goes up. Toss, toss, toss!

Step 2: Clean the Fridge – Walls, Shelves and Drawers
There’s no sense organizing a dirty fridge! Once you’ve tossed the old food, it’s time to take everything else out and give the refrigerator a thorough cleaning.
I wiped down the walls, scrubbed the shelves and inside of the door, and took the crisper drawers to the sink for a deep cleaning.
For some great tips on how to truly deep clean your refrigerator like a pro, check out this video from Clean My Space:
Step 3: Sort Food By Type
Next, take a look at your food. You’ll be creating refrigerator “zones” later on, so it’s very helpful to sort your food by type.
Helpful Refrigerator Food Groupings:
- Milk and bottled juice
- Beer, soda, bottled waters and juice boxes
- Fruits and vegetables
- Snacks
- Condiments and dressings
- Sauces and marinades
- Cheeses and deli meats
- Yogurt, butter and spreads
- Chicken, meats, fish
- Leftovers
- Eggs
- Wine
Step 4: Create Refrigerator Zones
The best way to organize a side-by-side refrigerator is by creating “zones” or areas where specific types of food are stored.
This will make it MUCH easier for all members of your household to find the food they want AND return foods to their proper place.
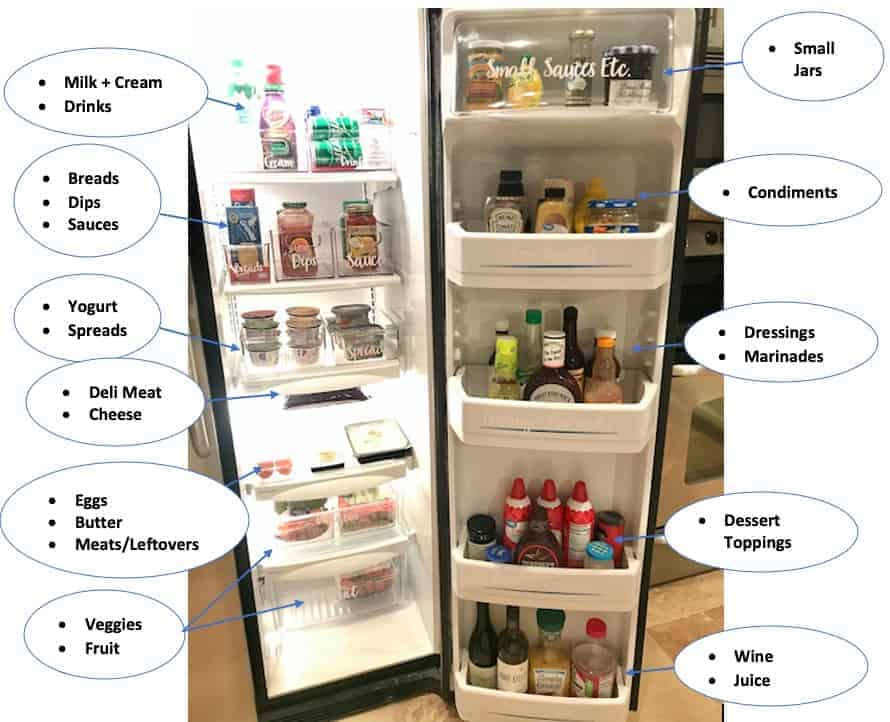
The zones you create will depend on the foods you consume. For my family, it made sense to set up my zones like this:

Pro Tip: Keep raw foods like uncooked chicken and steak on the lowest shelf,
so they won’t leak or drip onto your other foods.
The top shelf is best for milk and cream/creamers and freshly squeezed (or non-pasteurized) juices. Do not store them on the door, as that’s the warmest place in the refrigerator. Tall bottles of water or wine (if you don’t have door space) can go here as well.
Middle shelves are great for leftovers, snacks like yogurt, and dairy products like butter, sour cream, tubs of cream cheese, dips and spreads.
Lower shelves tend to be colder, so they are best for uncooked meats, fish and eggs. I also recommend lining the lower shelf with nonadhesive liner or a plastic placemat or two, as this tends to be the one that gets dripped and spilled on the most. It’s much easier to clean a placemat than a shelf.
If you have a deli drawer, store deli meats and cheeses in here. I recommend writing the date you purchased them on the front, to remind you when they need to be consumed. According to the USDA, unopened prepackaged deli meat stays good for about two weeks, while meats you buy from the counter are only good for three to five days.
RELATED ARTICLE:
Why Zones Are the Best Way to Organize Your Home
Step 5: Arrange Your Fridge for Maximum Efficiency
This is the fun part! Once you’ve identified the refrigerator zones, it’s time to place your items back in the fridge.
First, I highly recommend lining the door shelves with a ribbed or grip plastic liner. This will both keep your food items from sliding around when you open and shut the door AND catch any spills or drips.
I bought a large Cont-Tact Non-Adhesive Under Sink Mat and cut it to fit all of my door shelves and the bottom shelf of the fridge where I keep raw meats and chicken. It has a no-slip texture that works perfectly!

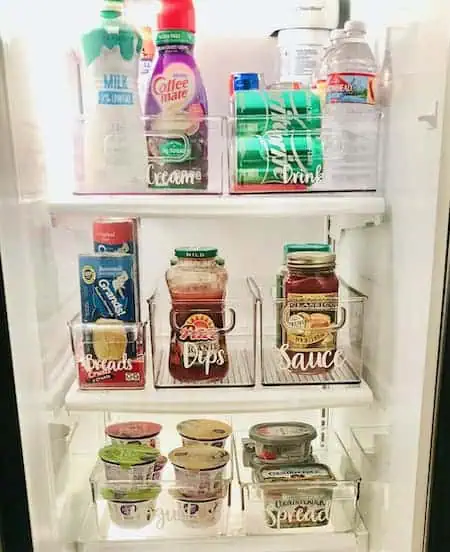
After you’ve lined your shelves, place your foods in labeled, clear plastic bins and arrange them in the refrigerator. Clear plastic is the best material because you can see all of your food at a glance.
PRO TIP:
Use stackable bins to organize a side-by-side refrigerator.
They save time when you need extra shelf space for leftovers, party platters, etc.
And labels are a MUST so that you and your family members remember where items belong. Without labels, it’s way too easy to throw food back in any old place.
Labeling can be as simple as using a Sharpie, a Brother label maker, or you can go BIG like I did and use a Cricut to create vinyl labels:

(Shout-out to my husband for suggesting white vinyl to label the refrigerator…it keeps everything looking very neat and understated.)
You might also like: Sensational Ways to Make Labels for Organizing Your Home
The BEST Refrigerator Organizers
I spent a LOT of time researching the best way to organize a side-by-side refrigerator. What I determined is that plastic shelf liner, clear, stackable bins and lots of labels are the way to go! Here’s a list of my favorite organizers:
Clear Stackable Food Storage Bin
These come in various shapes and sizes. I like smaller bins with handles that are easy to lift, move and stack:

Clear Stackable Egg Holder
I never liked keeping my eggs in their original cartons, because I couldn’t tell when I was running low. Now, I know exactly how many are left with a quick glance at this:

Clear Butter Holder
Now that I’m no longer storing butter on the top of my refrigerator door, I like to keep it in a clear holder so I can see how much is left. (Plus, it’s easy to take from the fridge to the table.) I bought this no-slip version, and I’m quite happy with it:

Clear Stackable Drink Dispenser
My family is small, so we didn’t need a separate drink dispenser. But larger families that consume bottled water or canned drinks can benefit from a handy, stackable drink organizer like this one:

Non-Slip Lazy Susan
A lot of people rave about using a Lazy Susan to organize their fridge bottles and jars. I had ample space on my door and didn’t need one, but it might work for you!

Related Article:
12 Life-Changing Ways to Organize With a Lazy Susan
Clear Non-Slip Shelf Liner
Honestly, any non-adhesive, non-slip liner will do…but I am in love with this Con-Tact under-sink mat, which I cut to fit my refrigerator shelves:

Erasable Food Labels
You don’t have to go Cricut-crazy like I did to label your refrigerator bins! A simple erasable food label system might be just perfect for you:

Side-by-Side Refrigerator FAQs
Is there a “best way” to organize a side-by-side refrigerator?
The best way to organize your fridge is the way that works best for your household. You may have completely different zones and food preferences than my family does, so play around with different ideas until you get a system that works!
How should I store food in my refrigerator?
According to Today.com, there are ideal places in the fridge to store certain foods to make them stay fresh longer.
The door is the warmest place in the fridge, so it’s not suitable for dairy products, eggs or unpasteurized juices. Instead, store items like condiments and bottled marinades and salad dressings there.
Store dairy and leftovers on the top shelves and keep fruits and vegetables in the crisper drawers where you can control the humidity.
What is the best way to store leftovers?
The USDA recommends immediately refrigerating leftovers at 40° F (or below) to prevent the growth of bacteria.
Keep leftovers in airtight containers or wrap in plastic to prevent spoilage.
And remember, leftovers only last 3-4 days in the refrigerator. To keep them longer, store in the freezer for 3-4 months.
What is the best way to maintain my refrigerator?
American Home Shield recommends conducting regular maintenance on your refrigerator to keep it running year after year.
This includes cleaning the coils, replacing the water filter, and checking the gasket for cracks. Check out their guide to refrigerator maintenance for more tips.
More Kitchen Organizing Articles
I hope you’ve been inspired to transform your refrigerator from BLAH to AHHHH! For more kitchen organizing tips and ideas, check out these articles:
How to Organize Your Stand-Up Freezer Like a Boss
The EASIEST Way to Organize Under the Kitchen Sink
Simple Ways to Organize Kitchen Drawers for Maximum Efficiency
15 Ways to Organize Pots and Pans in the Kitchen
12 Life-Changing Ways to Organize With a Lazy Susan
Splendid Snack Organizer Ideas
Last update on 2024-04-18 / Affiliate links / Images from Amazon Product Advertising API