This project was my husband’s brainchild, not mine. When we moved into our house, he wanted a way to store all of his hand tools in one open space. He needed easy access to everything.
His solution: a pegboard wall in the garage to organize tools. Bravo! Check out his brilliant ideas, and then give them a try in your workshop, basement or garage. You might be surprised by how versatile and efficient this solution can be!
If you’d like to save these tips for later, simply enter your info below. I’ll send them straight to your inbox!
Have tips sent to email to save for later:
This post contains affiliate links. As an Amazon Associate, I earn a small commission on qualified purchases at absolutely no cost to you. Please see the Disclaimer for more information.
1. Choose the Best Pegboard Options for Your Tools
Different people have different preferences when it comes to organizing. Some like every item hidden in a (hopefully, labeled) storage bin. Some like to easily see and access their items. I think pegboards are the best way to organize tools if you like to see everything all at once.
To be honest, I’m a little of both types of people. I prefer to organize with stylish bins or baskets in my living room or bedroom. I don’t need to see all of my items sitting out…to me, that feels a little cluttered. Bins and baskets in these spaces keep things tidy and peaceful.
On the flip side, I prefer to see everything in a craft room, workshop or garage. When I’m in the middle of a DIY or craft project, I need immediate access to all of my tools. That’s a given. The only caveat: it must stay orderly.
This is where pegboards come in. To me, they are the ideal way to see everything in one place, and they also help keep your work surface or space clean and neat. Win-win situation.
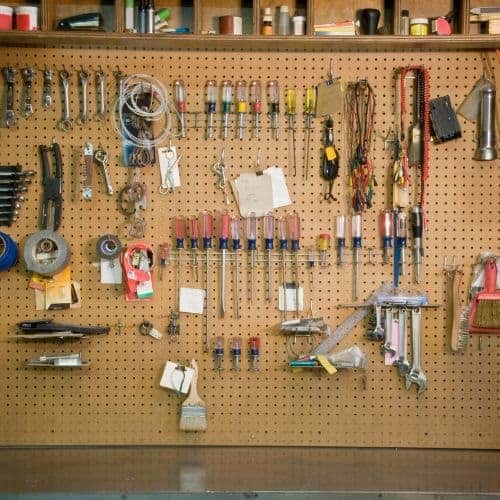
The first step in organizing your tools on a pegboard: choosing your pegboard material.
Pegboard panels can be made from metal, wood (fiberboard) or plastic. Which pegboard option is the best for your tool organization? It comes down to what you plan to hang on it, your budget and your personal aesthetic.
NOTE: I do not recommend hanging big corded tools on a pegboard. They take up a lot of space and the cords get in the way. We keep our large corded drill, sander, grinder, and other power tools in the original box on a garage shelf.
(Check out how we organized our garage shelves.)
A pegboard is perfect for hand tools like wrenches, hammers, screwdrivers, pliers, etc. It also works for smaller cordless tools, hardware, and an amazing additional number of things. You’ll see!
Metal Pegboard
Metal pegboard is very strong and durable. It’s also the most expensive solution. It can come as plain metal or powder-coated in a variety of colors.
The option below is made to mount right into your wall studs — time to get out the stud finder! It can also be mounted on sheetrock (with heavy wall anchors). This means you don’t have to frame your wall with wood furring strips before installation.

Fiberboard Pegboard
My husband and I used fiberboard pegboard panels on our garage wall, above our work table. Fiberboard is affordable, though it does need to be mounted on furring strips. Ours is just boring brown, but it works for our garage workshop.
You can also buy panels in white (see below) or black…or spray paint them yourself. They’re quite easy to customize to suit your aesthetic.

Check out this helpful video from Home Depot on how to hang a fiberboard pegboard.
Plastic Pegboard
I’m not sure I’d recommend plastic pegboard for a large garage area. However, it works nicely in a craft room for smaller tools and craft supplies:

2. Plan Out Your Pegboard Space
Once you’ve decided on your material, determine how much space you have to store tools, and which tools you’ll store on the pegboard.
There are SO MANY different ways to configure your tool collection…this is where you can get creative and have fun! The great thing is, you can’t really make a mistake here. You can always move things around later until you find just the right place for each item.
I personally like to map things out on the ground before I install them on the wall. It’s a great way to see how everything will look (especially on a large pegboard) and make changes and adjustments as needed. It also helps me purchase the right number of pegboard hooks and bins.
To map out the space, start with your largest tools. Figure out how they’ll fit on the board, set them in place (without hooks, just as placeholders) then add in your smaller items. You may also want to place similar items (types of wrenches, types of screwdrivers) near each other.
Once I’ve planned out my space on the ground, I like to take a picture so I remember later how I want the pegboard to look.
3. How to Choose Hooks and Pegboard Accessories for Your Tools and Hardware
After you have mapped out your tools and mounted your pegboard, the REAL fun begins: shopping for hooks, bins and all of the pegboard goodies.
A word of warning, though…(and take it from me, I’ve personally experienced the following): Standing in front of the pegboard accessories at the local hardware store can be overwhelming! Where to begin? With a list.
If you planned your space out ahead of time (Step 2), you’ll have an idea of how many hammers, wrenches and screwdrivers you need to mount. Write it all down.
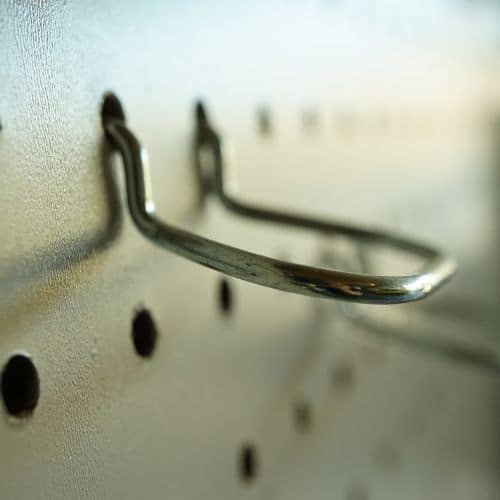
Other things to consider: You can mount bins for hardware and hooks for shop towels. You can even mount shelves on a pegboard if you want. The possibilities are virtually endless.
Here’s where I can help! Check out the different hooks, bins and accessories we used for different tools on our pegboard below, then add the ones you need to your list.
4. Use Double Hooks for Hammers and Paint Brushes
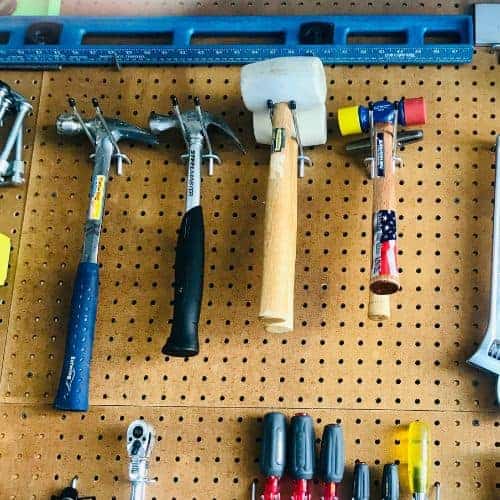
We lined up our hammers by size and type and slid them onto double metal hooks. There’s no chance of a hammer or tool falling off because the hooks are angled up at the end.
This type of peg also works for paintbrushes. Double hooks are nice and sturdy, perfect for heavier tools. If you put a few side-by-side, you can also set drills, glue guns and similar tools on them.

5. Try Multi-Ring Tool Holders for Screwdrivers
Screwdrivers are the most-used tools in my house by far. We have close to a dozen in all different sizes. A set of multi-ring tool holders keeps them neatly in place and within easy reach.


I recommend placing these lower on your pegboard wall. If you place them too high, it’ll be difficult to slide the screwdriver in from the top.
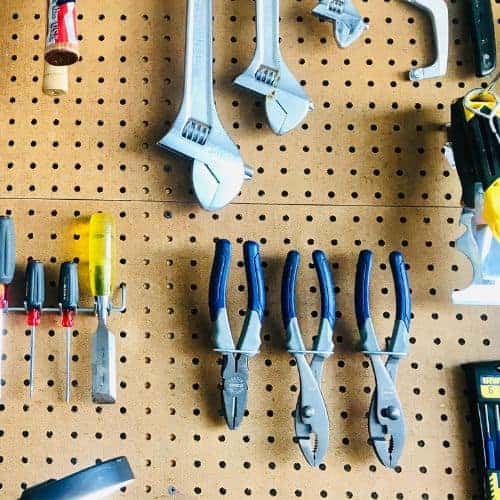
6. Use Plier Holders for Pliers, Scissors, Wire Cutters and More
These looped pegboard holders are the perfect way to organize tools like pliers and scissors. They also work for wire cutters/strippers and small garden tools like shears. See how nice and neat our pliers look? (Gosh, organized tools really make me happy, don’t they?)

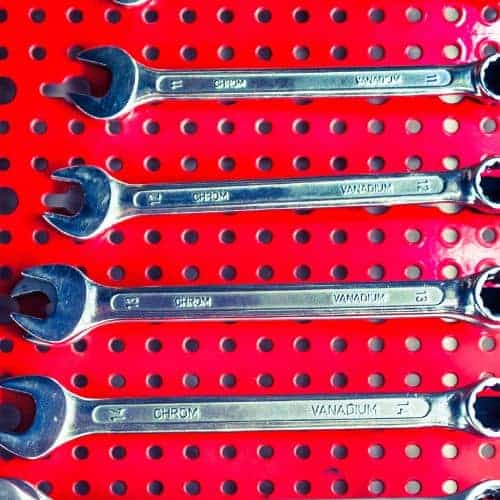
7. Hang Wrenches in a Row
Single hooks allow you to hang an entire set of wrenches in a row like we did here:
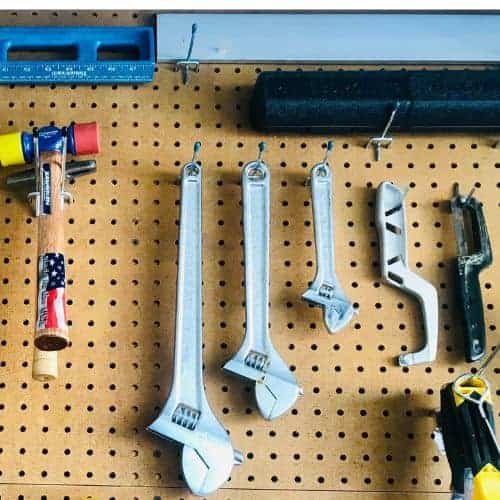
I love that we can see our wrenches all together. We know right away if we forget to put one away (not months later when we can’t find the size we need).

8. Store Levels Vertically or Horizontally on a Pegboard
If like a DIY home improvement project from time to time, you probably have a level or two. We have four. (Some projects require BIG levels and others need small ones.)
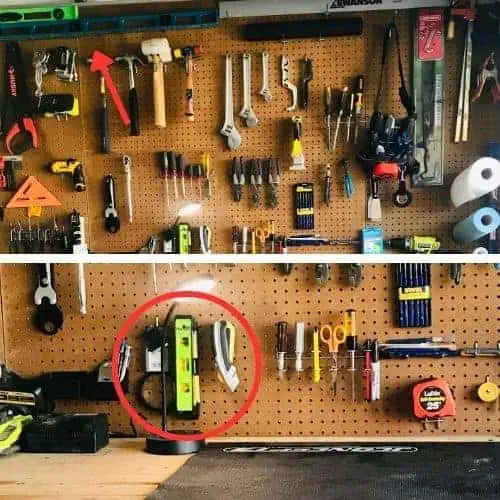
Anyway, you can store them on a pegboard, either vertically or horizontally. As you can see on our pegboard, small levels hang nicely from a single hook, and large ones sit horizontally in a series of hooks. Both options work well!
9. Hang a Toolbelt From Your Pegboard
My husband keeps his loaded toolbelt right on the pegboard, hanging from a hook. It’s so easy and convenient when we’re working on a project in the backyard or a distant part of the house and don’t want to tote single tools back and forth.
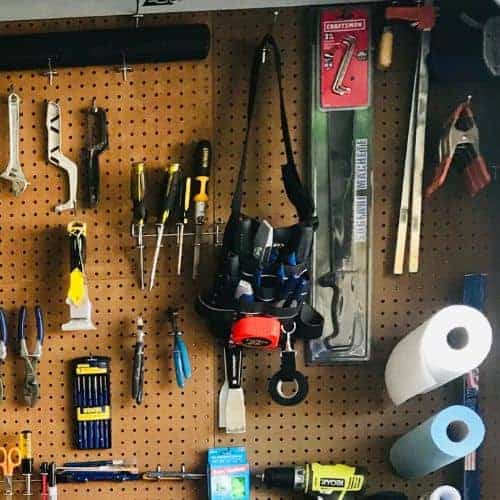
I also highly recommend a toolbelt for DIY projects involving light fixtures or ceiling fans. Tools have a habit of dropping off the ladder at the most inconvenient times.
10. Store Your Cordless Drill Using a Pegboard Drill Holder
They make hooks for your cordless drill and screwdriver! Store it right on your pegboard like this:

11. Add Paper Towels and Garbage Bag Rolls to Your Pegboard
Paper towels and garbage bags always come in handy in the garage. My husband installed 6-inch pegboard hooks to store rolls like this:
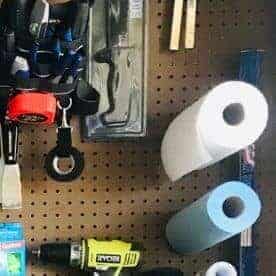
It’s a nice solution that saves space on the pegboard. However, you can also hang paper towels like this:

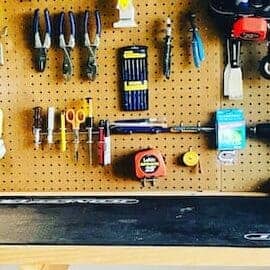
12. Store Tape Measures Right on the Pegboard
Never lose your tape measure again. You can store it easily right on a set of pegboard hooks like this:
13. Use Pegboard Bins to Organize Hardware, Craft Knives, Pencils and More
Pegboard bins offer a lot of versatility when you use them to organize tools like craft knives, pencils, small paintbrushes or hardware. We use ours for box cutters.
You can purchase small bins for washers, nuts, bolts and screws. You can also install tall cups for items like brushes, rulers and knives.

14. Hang Craft Mats on Your Pegboard
We have a few different mats we use on the workbench for different projects. When one is not in use, we roll it up and store it on hooks at the top of our pegboard:
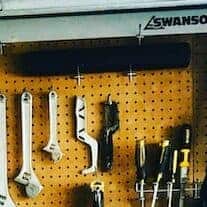
It keeps the mat clean and ready to use whenever we need it.
15. Install Shelves on a Pegboard
Pegboards can hold more than hooks and cups. You can install shelves right on your pegboard for items that don’t hang well.
Think: Spray paint, cleaning supplies, oils, grease and solvents. A pegboard shelf is easy and convenient for these products.

No Garage? A Pegboard Cabinet Adds Storage Space for Tools
You may not have a garage, or perhaps your garage is too small for tool storage. No problem!
A metal cabinet with a built-in pegboard becomes a perfect storage area in your mudroom, laundry room or other space in your home. Hang your tools on the pegboard and store other items like sports gear, paint cans or cleaning supplies on the shelves. I love that the option below locks for extra security.

Consider Pegboard Storage Solutions for Other Spaces in Your Home
Pegboard organization can help you with far more than tool storage! Yes, it’s great for craft storage. But try it out in your kitchen, laundry room or utility room too.
Use pegboards to organize jewelry and accessories on a closet wall. Put a pegboard above the desk in your office. This storage solution offers so many possibilities.
In fact, I have an entire post dedicated to different ways to organize with pegboards. Enjoy!
I hope you’re feeling inspired to install a pegboard for your tool storage needs. Be sure to check out more ideas below for organizing and decluttering tools, your garage, your yard and your car.
Happy organizing!
Related Organization Articles:
The Best Wrench Organization Ideas
Clever Ways to Organize Your Garage for Cheap
How to Declutter Your Garage Now
Beautiful Backyard Organization Ideas
Game-Changing Ways to Store Sports Gear
Captivating Ways to Organize Your Car
Clean and Organize Your Glove Box in 3 Steps
The BEST Road Trip Organization Tips
How to Get Organized for a Move
Last update on 2024-04-28 / Affiliate links / Images from Amazon Product Advertising API